Thursday, 19 September 2013

Animals in Art

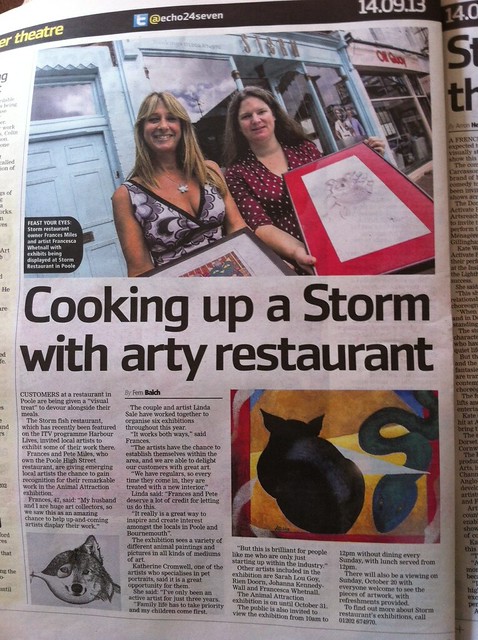
During September and October some of my animal linocuts are part of a great group exhibition at Storm restaurant in Poole. The exhibition features work by six artists with very different styles. Below are examples from some of the artists and a lovely little article that was in last Saturday’s local Echo. Yes, that’s me in the paper, urgh!

 
Egyptian Cat by Linda Sale  ~ http://www.linda-sale-fine-art.com/


Chicken by Sarah Lou Goy - http://www.pinkspiral.co.uk/
 
 
Dog portraits by Katherine Cromwell - http://www.facebook.com/KatherinesPaintings


A big thank you to Linda Sale who organises the exhibitions at Storm and to Frances Miles the restaurant owner who does a great job supporting local artists. Also, thanks to Katherine Cromwell for arranging the Echo article! I was also lucky enough to have work on display at Storm last summer, when they were filmed for the series 'Harbour Lives' with Ben Fogle. I know it's not a huge claim to fame but some of my watercolour still-lives were on the walls of the restuarant in a few shots of the series!

More info and shots of the exhibition here - http://stormart.webs.com/


Saturday, 7 September 2013

Poole Printmakers exhibition at Highcliffe Castle

Poole Printmaker’s next exhibition is at Highcliffe Castle from 11th September until 3rd November. There will be over 40 framed prints on display, with even more mounted prints and cards available to buy.

Highcliffe is a beautiful building in a lovely location and on the 18th of September they are having a Heritage open day which means it’s free admission all day (normally £3.25 for adults) and they will be opening later – with last admission at 7.30pm and the doors closing at 8pm.

We are making the most of the open day to hold our Private View which will be from 5:30 to 7:30pm on Wednesday the 18th of September. There will be wine, soft drinks and nibbles and it should be a great evening!


Friday, 23 August 2013

Red Arrows come to Number 83, Westbourne, Bournemouth

Thrilled to have my Red Arrows linocut in Number 83's fab window display!
They've also taken 4 other framed originals, some mounted prints and some of my new Dorset linocut cards, which have started selling already!
 
Here's a pic of the window and some of the other prints and cards they're now stocking:
 
 
Number 83, Westbourne - Beautiful Red Arrows window display with my framed linocut on the right


Poole Quay, original reduction linocut


Happy Cat - Original engraving


Red Arrows, Bournemouth - blank greetings card from my original linocut

 
Gold Hill - blank greetings card from my original linocut
 

Friday, 8 March 2013

Poole Printmakers at the Lighthouse

Poole Printmakers are exhibiting at the Lighthouse in Poole for 6 weeks starting next weekend. And I just managed to get my latest linocut finished in time to go on the poster! It's a reduction linocut and I've kept to almost monochrome colours (which is quite a change for me), but added some small touches of blue and red. You'll be able to see my 'Poole Quay' linocut and the other linocut that I've been working on 'Bournemouth Gardens' at the Lighthouse exhibition.
 
Poole Printmakers Exhibition at Lighthouse, Poole

Thursday, 14 February 2013

Folksy front page!

My Valentine's selection is on the Folksy front page!

Happy Valentines day!

Sunday, 6 January 2013

New Year, new site!

I've discovered Society6, and it's beautiful!
Having tried out a few similar sites in the past, Society6 is a really good-looking, and easy to use site, full of beautiful artwork and a slick range of products.

In their own words:
"The artwork on Society6 is created by hundreds of thousands of artists from around the world.
When you buy a product from Society6, we produce it using only the highest quality materials, and ship it to you on behalf of the artist."

I've decided to start with just a few of my favourite prints to begin with, and try and add a new one once a month... Here is a preview of what's in my store so far:

Happy Cat

Tiger teatime cushion
 
Hello Bear print

To see my new Society6 store, go here

Friday, 23 November 2012

Black Friday & Cyber Monday - Weekend Sale

For Black Friday/Cyber Monday weekend I've reduced 12 of my favourite original watercolour paintings by 20%!


Have a look at my sale section for a closer look.
 
AND I'm also offering 10% off your whole order with the code 10OFFBFCM2012.
 
Sale ends on Tuesday 27th Nov.
 
I've also just added a new selection to my range of cards which I'm quite exciting about. Here are some of my favourites:


You can see all of my individual cards here and all my card and postcard sets here.


Tuesday, 30 October 2012

Craft Coffee Cupcakes - Christmas Fairs!

Craft Coffee and Cupcakes are an exciting new art & craft venture that are coming to Bournemouth this November! They will be at the Pavilion Dance in Bournemouth Gardens on Sunday 11th and 18th of November, and the best in local art, craft and design will be on offer.

The jewellery, clothing, accessories, tasty food, beautiful cards, art and more will be accompanied by a lazy Sunday afternoon feel. The events are being sponsored by local hero’s Jimmy’s Iced Coffee and Lulubelle’s Cakes, who will be providing the 'Coffee and Cupcakes' of the title.

I'll be there on the 18th with a stall full of all my latest original prints and cards, check out my page on the Craft Coffee & Cupcakes website http://craftcoffeecupcakes.co.uk/francesca-whetnall/.

My latest reduction linocut


And I can't wait to have a browse through all of the other fantastic looking stalls! Some of my favourite local artists and crafters will be there too ~

Lisa Berkshire of Cheery Deary - http://craftcoffeecupcakes.co.uk/cheery-deary/

Beautiful mixed media mirror by Lisa Berkshire


Jill & Martin from Jilly Bird - http://craftcoffeecupcakes.co.uk/jilly-bird/

Fab Christmas mug from Jilly Bird


Karen from Print & Repeat - http://craftcoffeecupcakes.co.uk/print-and-repeat/

One of Karen's beautiful prints

Elanor McBay - http://www.elanormcbay.co.uk/hand-made-cards.html

Some of Elanor's crochetted and knitted creations

Craft Coffee and Cupcakes is the baby of Neil and Sarah Leonard. The couple, who together have a wide wealth of experience of craft and design incorporating everything from textiles and print to web and film, are now concentrating on event organising, creating collaborations across the creative sector.


Tuesday, 23 October 2012

Poole Printmakers Exhibition at Russell-Cotes Art Gallery & Museum

Poole Printmakers next exhibition will be at the beautiful Russell-Cotes Art Gallery and Museum from November 6th until Jan 27th 2013.

After a successful job with the Shaftesbury Arts Centre poster I was asked if I'd like to design the poster for this exhibition too, and I was able to put my latest linocut to good use! It's a 3 block linocut print, on which I've used transparent colours which create additional colours where they overlap. I hope to sort out a blog post with a bit more about how I created the print in the next few weeks.

The exhibition should be another great selection of original etchings, linocuts, collagraphs, monoprints and more from the talented group that are Poole Printmakers. And Russell-Cotes is always a fantastic gallery to visit, so if you've never been there before, this is a great excuse to get down there! It's also free over the winter, so what could be better!

Wednesday, 15 August 2012

An overview of Image size and DPI

I've written this mainly to help other artists who may need to produce 300dpi images to create printed versions of their artwork. I hope I've included most of the basics - feel free to skip along to the headings that you are interested in and please leave me any questions in the comments.

What does DPI mean?

DPI means how many dots or pixels will be printed per inch. It’s sometimes referred to as PPI (pixels per inch). Basically, the higher the DPI, then the better quality the prints will be.

However, a file showing a property of 72dpi might be better quality than another file that shows 300dpi – the actual image quality depends on the number of pixels in the image, also known as the pixel dimensions of the image.

i.e

  • An image showing 300dpi and pixel dimensions of 600 x 600 pixels will print a 300dpi image at 2 x 2 inches.
  • An image showing 72 dpi and pixel dimensions of 6000 x 6000 pixels will print a 300dpi image at 20 x 20 inches.
Conversely, changing an image’s dpi will change it’s print size. So, the same file can be printed quite large at a lower resolution, but the image quality will suffer.

i.e
  • A  6000 x 6000 pixel image will print a 300dpi image at 20 x 20 inches.
  • A  6000 x 6000 pixel image will print a 200dpi (lower quality) image at 30 x 30 inches.

What DPI do I need?

Web images

For posting images to the web you don’t need a very high dpi to show a good quality image. Image sizes for the web, also need to be kept relatively low so that the image size doesn’t slow down your web page or prevent images from loading at all. The standard size of images for the web is 72dpi.

Printing images

For professional printing purposes, an image being prepared for print should be no less than 300dpi if high image quality is required.
A resolution of around 200dpi can be used, but
lowering the DPI produces progressively lower output quality. The ideal DPI is dictated by the required quality and size of the final printed product.


How can I find out the DPI of my image?

For JPGs -

Right click on the photo and click properties.
Right click on the ‘Details’ tab and scroll down to where it shows the image details.
It will display something like this:

Dimensions                   1936 x 2592
Width                            1936 pixels
Height                           2592 pixels
Horizontal resolution      72 dpi
Vertical resolution          72 dpi

To understand what this means in real terms you need to divide the pixels by the DPI to see how many inches the image will be.

Formula to convert pixels to inches: Pixels ÷ DPI = Inches
So, for the example image above, at 72 DPI:

The width is  1936  ÷ 72 =  26.889 inches
The height is  2592  ÷ 72 =  36 inches

However, 72 dpi isn’t high enough quality for printing, so to work out how big your image will print at 300dpi you just need to divide the image dimensions by 300 instead of 72.

So, for the image above, at 300 DPI:

The width is  1936  ÷ 300 =  6.45 inches
The height is  2592  ÷ 300 =  8.64 inches

So if you print this image at 300 dpi then it would print out at 6.45 x 8.64 inches.

Photoshop/Adobe files

If you have Photoshop, you don’t need to get out your calculator.
Just bring up the image menu and click on Image size.
This window will show the pixel and document dimensions and the resolution.
If the image is showing a resolution of 72 dpi you can change this without altering the file, just make sure you untick the box ‘Resample Image’ first.

Then you can change the resolution number to 300 to show how that would affect the printed size.


What are Megapixels (MP)?

A camera’s megapixel (MP) count refers to the number of pixels it can capture by the million. The MP of a standard compact camera is usually based on the production of photo’s in 4:3 proportions. If a camera is branded as ‘4 megapixel’ this means that it will take photos containing approximately 4 million pixels. So, a photo of 4:3 (adjusted at best quality or highest resolution) has 2304 x 1728 pixels = (rounded off) 4.000.000 pixels = 4 MP.

If your 4MP camera is set to take the highest quality photos then you can calculate the maximum print size by dividing the camera’s pixel dimensions by 300 (the ideal print DPI):

2304/300 = 7.68” width
1728/300 = 5.76” height

So 7.68 x 5.76” is the maximum print size that the camera is capable of.


How do I take  an image with 300 DPI?

Taking a photograph

Images taken on a digital camera (or phone) usually display a dpi of 72. These photos will also be printable at 300dpi, you just need to calculate the final printed size based on the pixel dimensions of the photo.

The most important thing to remember when taking a photo with the aim of printing it is that you take as high quality photo as possible. A good quality digital photo should be:

  1. taken with a good quality digital camera (good optics and digital sensor)
  2. a photo that has not been enlarged either in post-processing or by in-camera digital zoom.
  3. properly shot with good lighting and no blur
  4. a photo shot within the camera's ideal ISO range (usually a low ISO such as ISO 100)
  5. stored in either a lossless format (i.e. TIF) or a very low compressed JPEG (highest camera JPEG quality setting).
  6. taken at the highest quality setting their digital camera allows.
If your camera is not capable of taking a photo with a dpi high enough for your required print size, or if you don’t have the experience or equipment necessary to take a high quality photograph you may need to consider using a professional photographer, or having your work scanned.

Scanning

If you're creating a digital image by scanning you have to set the DPI of the scan to meet the required DPI at the dimensions it is to be printed.

Formula for calculating the DPI needed:

Scanning DPI needed = (Required print size* x Print DPI) ÷ Original artwork size*

*The required print size and original artwork size is this formula refer to either the height or width of the image. You should do both calculations and use the higher result for your final scanning DPI setting.

Example:

Required print size = 60x40”
Print dpi = 300
Original artwork size = 10x8”

Pixel dimensions needed:

Width =  60x300 = 18000
Height = 40x300 = 12000

Scan DPI needed:

Width = 18000 / 10 = 1800
Height = 12000 / 8 = 1500

The two DPIs are not the same, as the aspect ratio (proportions) of the two print sizes are different. The rule is to simply pick the largest DPI number, in this case 1800dpi.

Some more simple examples:

To print a photo originally sized 4 by 5 inch the same size - scan it at 300 dpi.
To print a photo originally sized 4 by 5 inches at 8 by 10 - scan it at 600 dpi so that the final print size will be 300 dpi.

N.B Scanning at high resolutions makes great demands on your scanner’s memory, so if you need to scan at very high resolutions you may need to go to a printer with a higher spec scanner.


Can I increase the DPI of my image?

Ideally you should start with an image that’s high enough resolution at the required print size. But, as a last resort you can increase the dpi of an image using photoshop (other programs are probably available). Increasing the DPI of your image whilst keeping the width and height the same (or increasing the width and height whilst keeping the dpi the same) is known as resampling.

Don't resample an image unless you have no other option. The image will not be as high quality as it would be if you took a high enough resolution photograph/scan originally. Never resample the same image more than once as this will degrade the quality.

There are two ways to increase the size of an image in Photoshop, you can either resize the image, or you can resample it. These are not the same thing!

The difference between resizing and resampling: 

  • Enlarge by resizing – Increases the size of the image whilst reducing the dpi (untick ‘resample image’ box)
  • Enlarge by resampling – Increases the size of the image whilst maintaining (or increasing) the dpi (tick ‘resample image’ box). This will physically increase the number of pixels in the image!
To resize OR resample within Photoshop go to ‘Image’ and click on ‘Image size’. This window will show the pixel and document dimensions and the resolution.

To increase the DPI of your image you just need to tick the ‘Resample Image’ box and increase the resolution from 72 to 300 – your document size settings will remain the same, whilst the DPI is increased. It is as quick and simple as that, but you need to consider that enlarging your image and creating new pixels where they didn’t previously exist is bound to affect your image quality and will not improve it!

Photoshop has a number of ‘interpolation algorithms’ which control how it handles adding pixels when you resample an image to a larger size. There are three main options to choose from:
  • Bicubic Sharper – Use this option when resampling your image smaller for best image quality
  • Bicubic Smoother – Use this option when resampling your image larger for best image quality
  • Bicubic – Not really used much now that the other options are available.
Just remember, increasing resolution in Photoshop WILL NOT increase the quality of the image. It should only be used as a last resort to create images that will print slightly more successfully than lower resolution ones. You will never be able to create a really high quality image from a low dpi file.


This post was put together with lots of help from the following websites and forums, thank you!:


What Printshops really want


Friday, 29 June 2012

Summer Art & Craft Workshops 2012

The Arlington Arts Cafe in Bournemouth is running an exciting series of art and craft workshops this summer. There will be friendly tuition provided in the beautiful setting of the café terrace, overlooking Bournemouth’s Lower gardens.

Ever fancied learning how to crochet, sculpt or print? Are you a keen amateur painter or a complete beginner looking to improve your skills? Then these are the workshops for you!

The workshops run from late June right through into September. Each session will be for 2 hours in the morning or afternoon and will require no previous experience. Adults and children welcome! (all children must be accompanied by an adult ).

I will be running a number of Relief Printmaking workshops as part of the summer season. From potato prints to wood engraving, relief printing is a great way to create exciting and repeatable printed images. On my workshops you will be taken through the steps to create your own original, handmade prints using simple equipment including
plasticine, card and polystyrene. 


The price for each 2 hour workshop is just £7.50 per person and includes a free drink!

Booking is not essential, but recommended to avoid disappointment. All paper, paints and equipment will be provided, so you are welcome to just turn up on the day.

To book, or find out more leave me a comment or -

Book on one of the workshops on Facebook
or
Phone the Arlington Arts Café on 01202 552879 or contact  Ruth Kelvin on 0758 6431184
or
Email enquiries@arlingtonbournemouth.co.uk or email ruthkelvin37@gmail.com.
or
visit the Arlington Arts Cafe website

This series of Summer Art workshops have been arranged and co-ordinated by Ruth Kelvin of the RK Collection.

For further info and the full schedule see the Arlington Arts Cafe website

Monday, 28 May 2012

Dorset Arts Week 2012 - Exhibition at Poole Printmakers

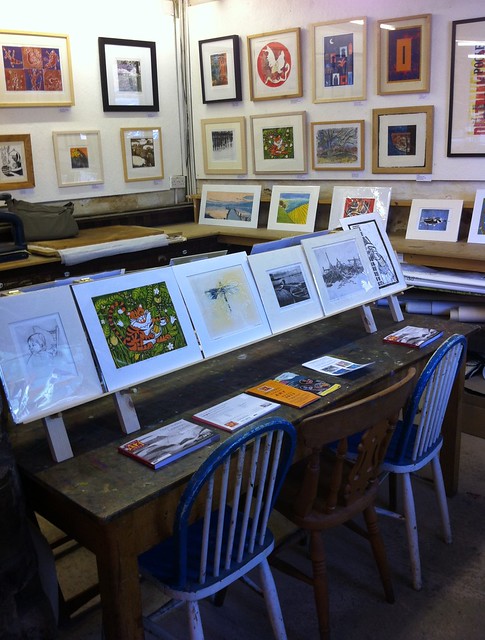
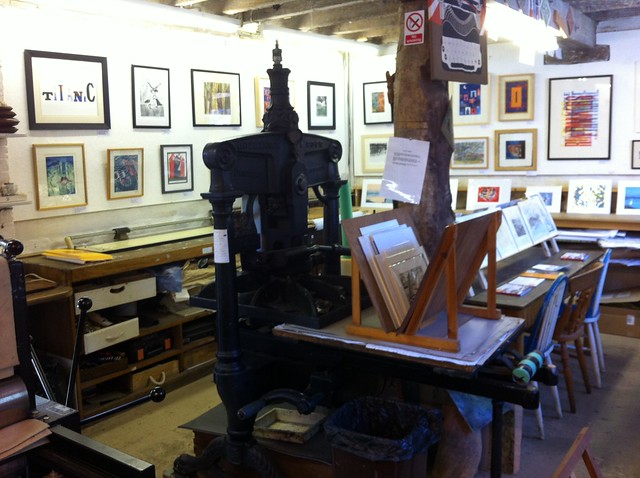
Dorset Arts Week started this weekend and Poole Printmakers have a beautiful selection of prints on show including a handful of mine.

The workshop will be open from 26th May till 8th June, with loads of beautiful affordable prints to buy & the opportunity to have a good look round the workshop and see artists at work.

Prices for framed original prints range from just £25 to £300.

Here are some snaps of the exhibition in the quiet before the opening:


For more info see the Poole Printmakers page here - http://www.poole-printmakers.org.uk/DAW_Page.html

For more photos see my Flickr set or Facebook page

Monday, 14 May 2012

Monkeys - linocut in progress

Here are a few shots of my latest linocut edition in progress. I'm creating this as a reduction print, which means I use just one piece of lino and cut it down after each colour before printing the next.

Snap of the print after the 1st two colours have been printed, a pale yellow and quite a bold blue:


After all the prints have had the blue printed I cut away the Lino ready to print the next colour, green. The thing to remember is that you need to cut away everything that you want to remain the previous colour, i.e blue in this case.
Here is the print with the green plate added:


After cutting away again the next colour was brown, here is a shot of the roller & glass slab where I'm preparing the ink:


And here is the Lino block ready to print the brown, you can see the card template I'm using for registration in this shot. It's got strips of card to line up the Lino with, and pen lines to mark where I should place the paper. This is how I manage to print each colour in the right place on top of the previous colour. Registration is a tricky business & there is always some slight difference in each colour - which adds to the handmade quality of the prints, and makes each one unique!


Here is the print with the brown added, looking almost finished!


Just one more colour to go, here is the Lino being cut down for the last colour:


It's always a bit scary cutting away each time, there's no going back!

At the moment I'm still waiting for the brown to dry before I can print the last layer.... watch this space.

You can also Follow me on Facebook to see all my latest work in progress.
And have a look at my Etsy store for all my available original prints.

Tuesday, 1 May 2012

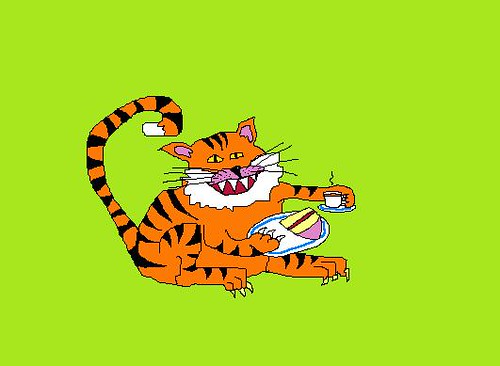
Tiger tea time - edition of 33 linoprints

Yey, I've completed my first ever relief print edition!

I decided to base the print on a quick sketch I'd made using 'MS Paint' a number of years ago:


After redrawing the design I thought it might be nice to stick him in a jungle setting (I didn't realise how much work that would mean at the time!). I used 3 lino blocks for the image - one for orange, one for black and one for yellow & green (I used a reduction technique to cut into the background yellow block to create the green block). Here are a couple of images of the print in progress:


And here's the final print:


With a handful of slightly imperfect prints, I ended up with just 33 finished prints in the edition. Not too bad for a first attempt and I've learnt a lot along the way. Here are some of the things I'll be trying to remember for my next print:

  • Reduction should improve registration (i.e. all the colours will line up more easily if each colour is printed from the same lino block.
  • Cut the full picture before testing. It's much harder to see where you're cutting after it's been inked!
  • Use paper cut outs to mask big areas of the lino that shouldn't be printing (i.e sometimes the cut sections of lino pick up ink that you don't want to print, cover these up with clean pieces of paper before printing).
  • Plan carefully! - Make sure you know exactly what you need to cut away at every stage.
  • Wear gloves - printmaking is a very messy business but wearing gloves whilst inking up means that you should be able to keep the print edges clean. And it will cut down on repeated washing of hands.
I'm hoping to enter my little tiger into a couple of printmaking exhibitions later in the year, but until then he's available to buy online from my Etsy shop:
http://www.etsy.com/listing/98769525/tiger-tea-time-signed-original-hand


Wednesday, 22 February 2012

Lost Star - A Titanic box set of prints & touring exhibition

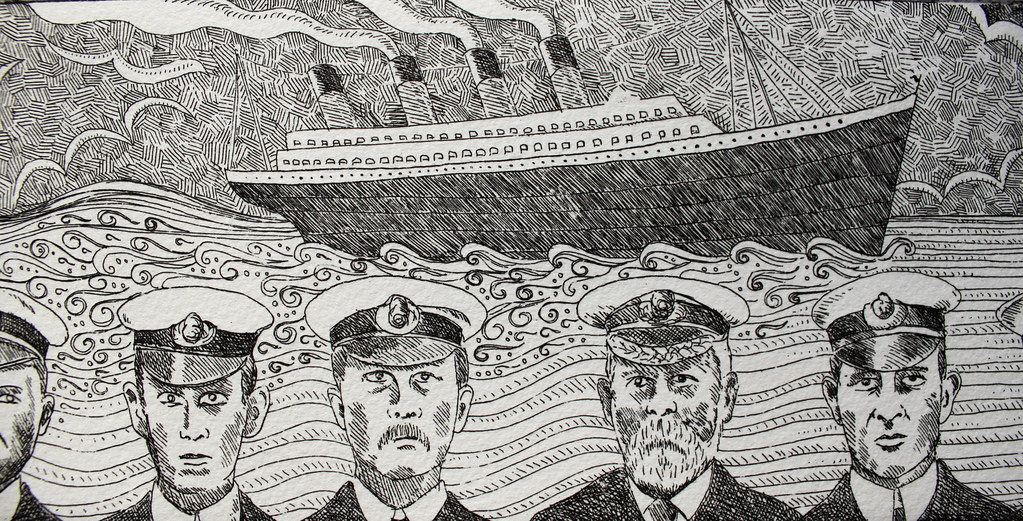
Five months ago I was excited to discover that the Red Hot Press print studios were running a group project to create a box set of prints to commemorate the loss of the Titanic, a century ago this April. Not only could I take part in a group printing project, but I'd get to keep a box set for myself!

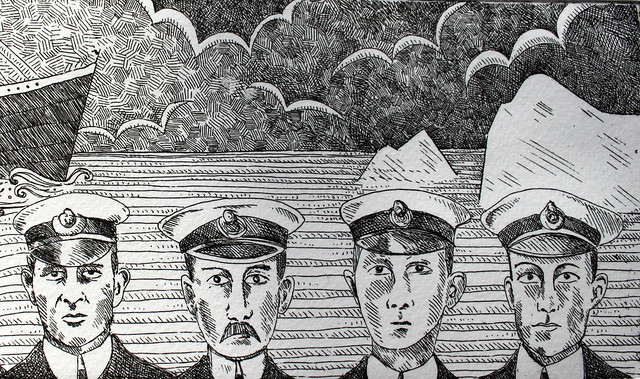
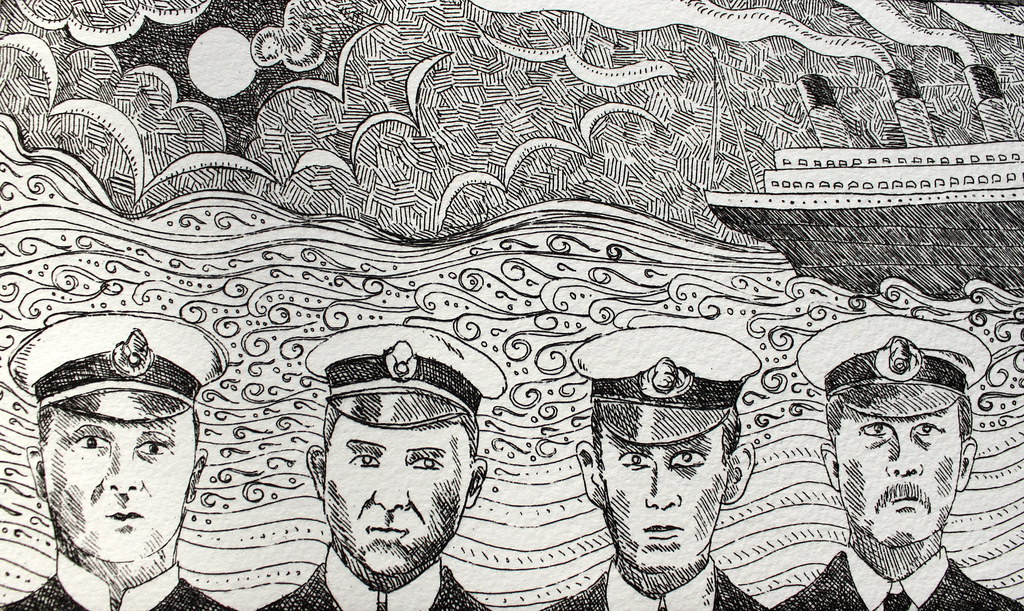
After mulling over a few different ideas I decided on a design which attempts to combine the elegance and majesty of the titanic with some indication of the human cost. I've only done a few etchings in the past, but I thought it would be the best medium to use for my quite complex and detailed design. 

Etching - the process

A waxy acid-resist, known as a ground, is applied to a metal plate, usually copper or zine but steel can also be used. There are two common types of ground: hard ground and soft ground. I used hard ground from a tube, which was spread on my zinc plate with a roller, coating it evenly and thinly. The ground was then heated to harden it. 
Once hardened, I used a basic etching needle (you can use anything including a nail) to scratch into the ground, exposing the metal (but not scratching into it). I had already drawn my design out (in reverse) and a roughly traced it onto the ground as a starting point before etching. Once my design was completed I then submerged it in a solution of copper sulphate (much safer than other etching acids) which eats away at all of the exposed parts of the metal.  To test the strength of the solution I had already created a test plate and tried out various etching times. My plate was exposed to the copper sulphate solution for about 9 minutes, which resulted in a good strong bite (the lines were etched deep enough so that they will hold enough ink when printed, and not too deep, so that they are too wide).
The plate was then removed from the solution and rinsed in water. The ground was removed with turpentine.

Printing
I used a piece of mount board to push ink into the etched lines of the plate. The next bit was the most time consuming - cleaning the plate with scrim and tissue, to remove all of the excess ink from the surface of the plate. This wiping leaves ink only in the incisions. Once the plate is fully inked and carefully wiped clean it's ready to be printed from. I used heavy, somerset paper which had been soaked and patted dry. The zinc plate was placed face up on the etching press bed, and the damp paper laid over the top (being careful to leave an even edge around the plate). The press blankets are then placed over the paper (usually with some newsprint between paper and blankets to prevent getting any marks on the blankets), and the print run through the press.

My final etching


Captain Smith and Officers ~ SS Titanic

Details:


'Lost Star' - Box set overview


Number of Artists involved: 16
Number of Box Sets: 27 (each containing 16 prints)
Number of Box sets for sale: 10 (each containing 16 prints)
Price : £300 (a fantastic price for so many original artworks!)


The 'Lost Star' box set of prints will be on a touring exhibition:

The Concourse Gallery of Southampton Solent University
Michael Andrews Building, East Park Terrace, Southampton, Hampshire SO14 0YN.
The Private View is on 12th April 2012 5pm - 7pm. 
The exhibition continues until 22nd May 2012.

The opening hours are Weekdays 7:30am-9:00pm, Sat/Sun 9:00am-4:00pm
The Link Gallery
West Downs Centre, Romsey Road, Winchester SO22 5HT 

The Private View is on Thursday 5 July 6pm - 8pm. 

The exhibition runs from the 2 July – 6 August. opening hours 9am - 5pm every day.

Here is a sneak preview of one of the other beautiful prints that is part of the set:
 Save our Souls (Collagraph) - Ruth Barrett-Danes

For more info on the Lost Star project and the Red Hot Press see their website


LinkWithin

Related Posts with Thumbnails